

To wrap handlebar tape, start at each bar end and work toward the stem, overlapping every turn while keeping steady tension. Cover the tops, drops, and bends without gaps, then finish near the stem and secure the tape. Tuck the bar-end sections inward, fit the plugs, and check that controls stay accessible.
Fresh tape can restore grip, cover worn or dirty bars, or change how your hands feel on road or gravel rides. Follow the tape and handlebar manufacturers’ instructions, and have a bike shop check the work if you are unsure about anything that affects steering.
What You Need
Gather supplies before removing old tape so you can keep the handlebars supported and finish each side without rushing. Check the new tape package for included plugs or finishing strips, since kits differ.
- Handlebar tape suited to your bars and riding preferences
- Scissors or a sharp utility knife for trimming tape
- Electrical tape, if your tape kit does not include finishing strips
- Bar-end plugs, if the existing plugs are missing or damaged
- A clean cloth and a suitable cleaner for the bare handlebar surface
- A small tool to reposition the brake and shift hoods, if needed
Use a sharp cutting tool carefully, and keep the blade pointed away from your hands and cables. Avoid solvents or cleaners that could damage handlebar finishes, tape adhesive, or control cables.
Step by Step
Work on one side at a time and compare each side as you go, especially around the brake hoods. Consistent overlap and tension matter more than speed.
- Remove the old tape and bar-end plugs. Peel carefully around the controls so you do not pull or kink cables.
- Clean the handlebars and inspect the surface. Remove leftover adhesive, then check for damage or anything that could keep new tape from lying flat.
- Position the brake and shift cables against the bars. Use the tape kit’s cable-covering strips, if supplied, to hold cables in place and reduce ridges.
- Fold the brake hoods forward to expose the handlebar beneath them. Check that you can reach the cable area without straining or pulling on control housings.
- Start at the open end of the bar and leave enough tape extending past the end to tuck inside. Follow the tape maker’s direction for the first turn and keep the material under steady tension.
- Wrap toward the stem with each turn overlapping the previous turn. Keep overlap consistent, and avoid stretching the tape so hard that it narrows or distorts.
- Cover the handlebar bend and work around the brake hood carefully. Use any supplied finishing pieces to cover exposed areas, and keep the tape clear of moving parts.
- Trim the tape near the stem at an angle, then secure the end with the supplied finishing strip or suitable electrical tape. Press the finish down so it cannot peel during use.
- Tuck the extra tape into the bar end and install the plug. Return the brake hoods to position, then check both sides for gaps, loose sections, and unobstructed controls.
Common Mistakes
Wrapping With Uneven Tension
Uneven tension can leave loose sections that shift under your hands or tight sections that stretch and deform. Keep a firm, consistent pull as you wrap, and pause to correct a turn as soon as it begins to bunch.
Leaving Gaps Between Turns
Gaps expose the handlebar and can make the finished wrap feel uneven. Overlap each turn consistently, and pay close attention to bends and the area around the brake hoods where the bar shape changes.
Wrapping Over Dirty or Damaged Bars
Dirt and old adhesive can prevent tape from sitting flat, while damage beneath the wrap can go unnoticed. Clean and inspect the handlebar before installation, and ask a bike shop to assess damage you cannot identify.
Cutting the Tape Too Short
A short bar-end section may not tuck securely beneath the plug, and a short stem-end section may not stay covered. Leave enough material for the intended finish, then trim gradually rather than removing too much at once.
Blocking Controls or Missing the Bar-End Plug
Tape must not obstruct brake or shift movement, and an open bar end can leave the wrap unsecured. Check control operation and plug fit after wrapping, then correct any interference before riding.
When to Take It to a Bike Shop
Ask a mechanic for help if the handlebars are cracked, deeply scored, or otherwise damaged, or if control cables and housings appear frayed, pinched, or displaced. Bar tape can hide these problems, so do not cover damage and assume the handlebar is ready to ride.
A shop can also help if the brake hoods will not return to position, a control feels different after the work, or you cannot secure the tape and plugs. Follow the component makers’ instructions and avoid riding until you understand and resolve steering or braking concerns.
Gear That Helps
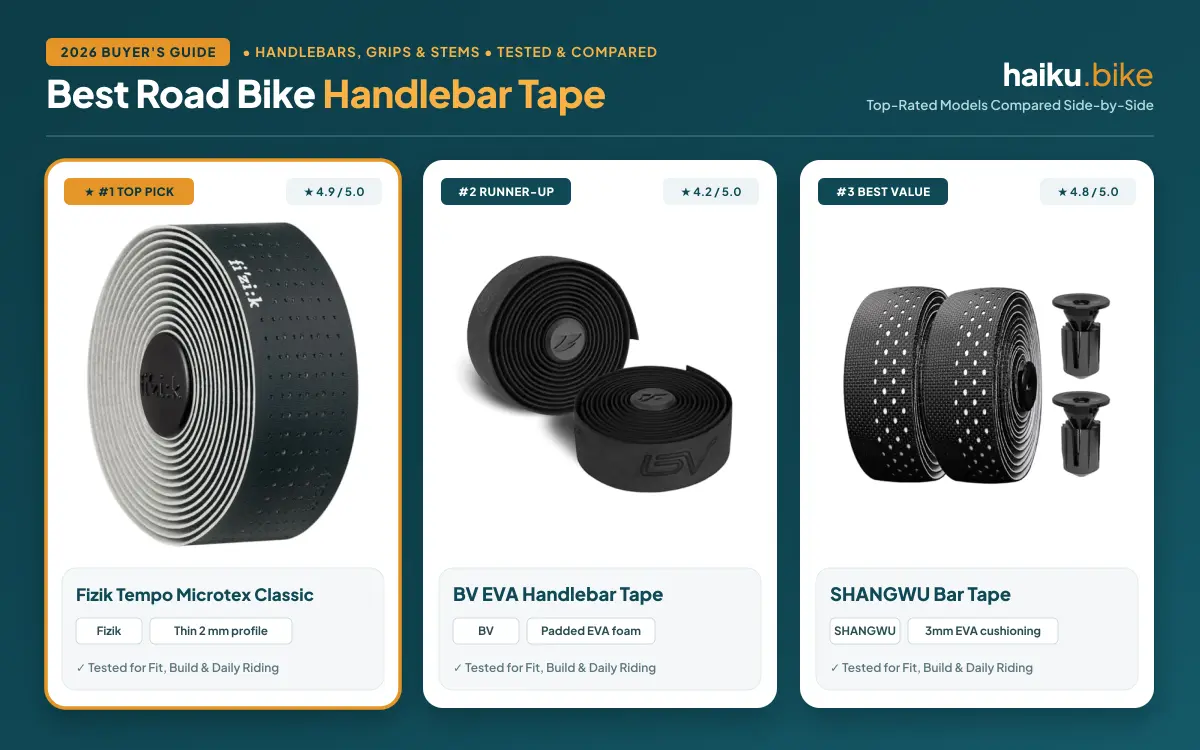
Handlebar tape differs in texture, thickness, cushioning, and surface material. Compare options against your preference for direct bar feel, cushioning, grip, and ease of cleaning, and confirm that the package includes finishing pieces you need.

Pros
- 2.5mm cushioning
- Grip designed for wet conditions
- Tool-free installation
- End plugs included
- Easy-clean surface
Cons
- No owner reviews available
- No stated handlebar compatibility details

Pros
- Thin 2 mm profile
- Perforated leather-like texture
- Smooth surface
- Classic aesthetic
- Black color
Cons
- Limited cushioning from 2 mm profile
- Only black listed

Pros
- 3mm EVA cushioning
- Oil- and stain-resistant surface
- Vent holes across installed tape
- Self-adhesive backing
- Aluminum alloy bar plugs
Cons
- Available only in black
- No stated tape width
- No stated weight

Pros
- Perforated PU surface
- Lightweight polyester and EVA construction
- Adhesive cotton backing
- Rubber bar-end plugs included
- Honey color
Cons
- No thickness listed
- No grip or cushioning details
- One size only
FAQs
Which direction should you wrap handlebar tape?
Handlebar tape usually starts at the bar end and wraps toward the stem, with each turn overlapping the previous one. Follow the tape maker’s instructions for the direction of rotation, since the correct direction helps keep the wrap from loosening under your hands.
How much should handlebar tape overlap?
Handlebar tape should overlap enough to cover the bar completely without leaving gaps or making the wrap bulky. Follow the tape maker’s guidance and keep the overlap consistent from the bar end to the stem, adjusting carefully around bends and controls.
Can you wrap handlebar tape without removing brake levers?
You can usually wrap handlebar tape without removing brake levers because the wrap passes beneath the brake hoods. Fold the hoods forward enough to reach the bar, then use any supplied finishing pieces to cover the exposed area without interfering with control movement.
Can you reuse handlebar tape?
Handlebar tape may not reinstall neatly after removal because adhesive can lose its hold and the material can stretch, crease, or tear. Inspect removed tape before considering reuse, and replace it if it cannot lie flat or stay secured across the handlebar.
How do you know when handlebar tape needs replacing?
Replace handlebar tape when it is torn, peeling, persistently slippery, or too worn to cover the bars evenly. Check beneath loose sections for dirt or damage, and make sure replacement tape and plugs fit your handlebar and control setup.
Should handlebar tape be tight?
Handlebar tape should feel secure without being stretched so hard that it thins, distorts, or tears. Keep steady tension as you wrap, then check the finished surface for loose areas and confirm the bar-end plugs hold the tucked tape in place.
For help comparing tape materials and riding priorities, see our road bike handlebar tape guide. Browse more advice in Handlebars, Grips & Stems or explore the wider Parts & Components category.





Write Your Review
No reviews yet. Be the first to share your experience!